by T.H. David, PT, DPT
What is the Rotator Cuff?
The rotator cuff comes up all the time in workout videos, social media blasts and blog posts (heh), but what is it? How big is it? How many muscles are involved? How does one get it to be strong and stuff?
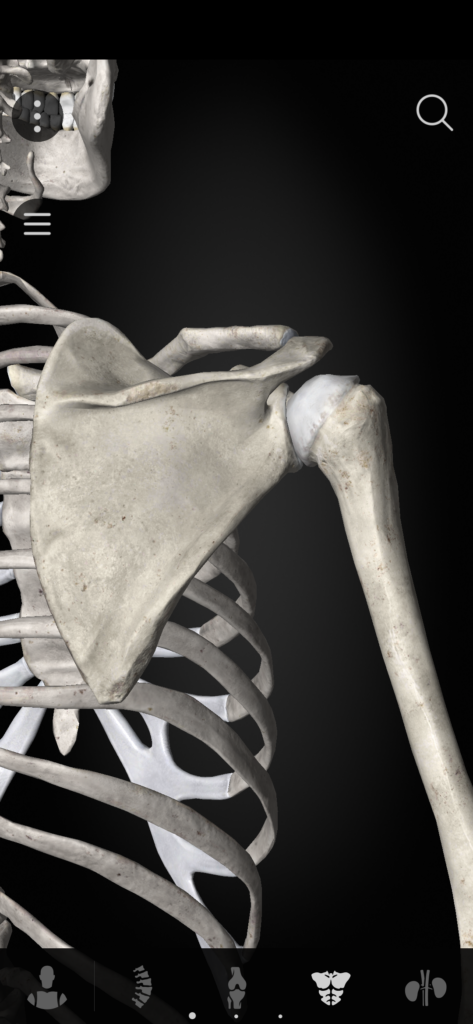
What are the bones involved?
First, let’s chat about bony anatomy. The shoulder joint is described as a “ball and socket,” but really, it’s more “golf ball on tee.” If you’ve golfed 3 times like I have, you’ll know that balancing a golf ball on a tee is the hardest part of the game. So if the shoulder looks similarly precarious, how the heck does it stay together?

What is the rotator cuff?
The rotator cuff itself consists of a grouping of four muscles that all share two jobs – to rotate the humerus, and to cuff (think the end of a shirt sleeve) around the humerus, hence the name. When viewed straight above the golf ball over the tee, you can see that the muscles all end in the form of a “cuff” around the head, or “ball” of the humerus.
What does the cuffing accomplish?
Well, if you can imagine all those muscles pulling at once, they will pull the ball more securely onto the tee. This is the same principle as when I would tape the golf ball onto the tee after it fell off repeatedly. In practice, the rotator cuff musculature keeps the golf ball on the tee while the other big muscles (lats, pecs, delts) help you stick that crux move.
How does it rotate?
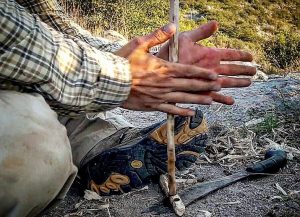
First, imagine trying to start a fire by spinning a stick. When you pull with your left and push with your right, the stick rotates one way, and when you push with left and pull with right, the stick rotates the other way. The rotator cuff works the same way by having muscles on either side of the humerus, so it can pull it to rotate both inward and outward.
Specifically, the rotator cuff consists of 4 muscles. 3 of these muscles sit on the back of the scapula (shoulder blade), and 1 is on the underside of it, inside the armpit. The 3 muscles that sit on the back of the shoulder blade are the supraspinatus (blue), infraspinatus (orange), and teres minor (yellow), while the one underneath is called subscapularis (green).
The reason they’re divided into two subgroups is the same reason you need two hands to start a fire! The 3 muscles on the back rotate the humerus into external rotation, with the hand moving outward (“Seriously? You flashed my project??”), and the 1 muscle on the underside rotates the humerus into internal rotation, with the hand moving inward (“Too many tacos…”).

In short, when all 4 muscles pull, they anchor the ball to the tee, and when they work in their subgroups, they rotate the ball on the tee instead.
Why Does it Matter for Climbing?
Climbing is a complex sport. Shoulders are put into wild positions through stemming, locking off, dyno-ing, and compressing. Throughout all these positions, the further the shoulder gets away from neutral, the more the muscles surrounding the shoulder need to activate to maintain proper positioning and keep that ball on the tee. And if these muscles aren’t doing their job, it could lead to an injury! No good! These muscles need to be primed to work, and when they are, your shoulders are going to be bombproof on the wall (and keep your elbows from flaring out when you’re tired).
Cool Stuff, How Do I Get the Rotator Cuff Stronger?
You’ve likely seen people in the gym do wild stuff with bands. Well, they’re likely on to something. I keep a band in the side pocket of my chalk bucket, and perform these exercises as a warm-up before climbing to make sure my rotator cuff is ready to rock and roll.
Exercises: 2-3 sets x 15 reps each
No Moneys: this is a great, commonly utilized exercise to get the external rotators warmed up. However, it is only warming them up while the shoulder is in a neutral position, so we need to warm them up in other positions, too!
No Pyramids: this is like the No Moneys, but you maintain tension in the band while lifting your arms and keep your elbows from flaring (i.e. making a “pyramid” shape). This warms the external rotators up while going into shoulder flexion.
W’s: Now we’re getting toasty! This exercise is working into the “lock-off” position with the arm more out to the side. Elbows are just out to the side, to make a “W” shape with your arms if you were doing it with both sides.
Goal Posts: Even crazier! W’s, but now your elbows are pointing straight out to the side.
Hoorays: Let’s add them all together! Go from a W all the way up to the ceiling, maintaining consistent tension on the band. Hooray….you’re done.
If you have any questions or are experiencing pain or discomfort performing any of these exercises, please reach out for an appointment!